Key Takeaways
- A tub-to-shower conversion is often a smart choice when the bathtub is rarely used or difficult to enter.
- Using the existing tub footprint can reduce plumbing changes, construction time, and cost.
- Low thresholds, grab-bar backing, slip-resistant surfaces, and practical lighting improve safety for users of all ages.
- Waterproofing, drainage, and installation quality matter more than decorative tile or glass.
- A written scope, realistic budget, and clear material selections help prevent delays and change orders.
Replacing a bathtub with a shower can make a bathroom easier to use, improve access, and create more open floor space. However, the project involves more than removing the tub and installing a shower base. Drain placement, plumbing, waterproofing, wall surfaces, ventilation, storage, and shower access all need to work together for a durable result.
For homeowners planning a bathroom remodel River Park, the first step is to assess how the existing bathroom is used and what the new shower should accomplish. A low-threshold entry, handheld showerhead, built-in seating, grab bars, and easy-to-clean surfaces can improve everyday comfort. Careful planning also helps identify potential plumbing or structural issues before construction begins.
Why a Tub-to-Shower Conversion May Make Sense
A tub-to-shower conversion can be worthwhile when the existing bathtub no longer matches how the household uses the bathroom. Before removing it, consider bathing habits, household needs, available floor space, and whether another bathtub is available elsewhere in the home.
Families with young children may still need a tub, while other homeowners may prefer easier access to the shower. If another usable bathtub is available, converting a secondary bathroom may offer more flexibility. Thinking through these factors before construction can help ensure the new shower serves a practical need rather than simply following a design trend.
Questions to Ask Before Removing the Tub
- Who uses this bathroom most often, and what do they need from it?
- Is there another bathtub in the home?
- Are the current supply lines, drain, subfloor, and walls in good condition?
- Can the new shower fit within the existing tub area?
- Would a seat, a handheld showerhead, or support bars improve comfort?
- Do local rules require permits, licensed trade work, or inspections?
Choose the Right Shower Layout
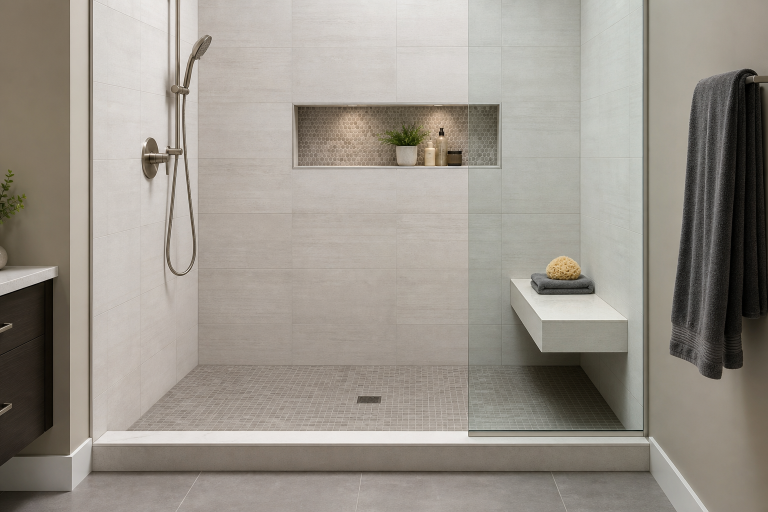
Keeping the shower in the original tub space is usually the simplest layout. A prefabricated base and wall surround can offer a streamlined installation, while a custom-tiled shower provides more flexibility in size, shelving, and finish choices. A curbless or near-zero-entry shower may be especially appealing when easier access is a priority, although it can require more subfloor and drainage work.
Plan the Entry and Drain First
Measure the room before ordering a shower base, door, or glass panel. Confirm clearance around the toilet and vanity, then decide whether a curtain, sliding door, hinged door, or fixed glass panel best preserves the safest path into the shower. Moving the drain can add labor and affect the schedule, so it should be discussed early rather than discovered after demolition.
Build Safety Into the Design
Safety features do not have to make a bathroom look institutional. A low threshold, textured shower floor, bright lighting, easy-to-reach controls, and a handheld showerhead can make the space more convenient for nearly anyone. A built-in bench or fold-down seat adds comfort for shaving, recovery from an injury, or reduced mobility.
Ask the installer to add solid blocking behind the wall finish where grab bars may be needed now or later. The National Institute on Aging recommends features such as good lighting, grab bars, and nonslip surfaces to make a home safer for long-term independent living. Nonslip strips on wet surfaces and well-placed bathroom support can benefit visitors, parents, and people recovering from surgery, not only older adults.
Waterproofing Comes Before Style
Beautiful tile cannot compensate for a poorly waterproofed shower. The shower pan, wall membrane, seams, corners, curb or threshold, and drain connection must work as a complete system. Even a small hidden leak can damage framing, weaken subflooring, and create conditions for mold.
Ask how the shower pan will be sloped, how wall seams will be sealed, and whether the installer performs a water test before tile or wall panels cover the system. These questions are more important than selecting grout color or door hardware during the earliest planning stages.
Materials That Are Easier to Maintain
- Large-format tile: Offers a clean appearance with fewer grout lines, but still requires proper sealing and cleaning.
- Smaller tile: Provides design flexibility and can offer more traction on shower floors, though it has more grout joints.
- Acrylic or composite panels: Use fewer seams, and they can be easier to maintain than tile-heavy walls.
- Solid-surface systems: Create a sleek, low-maintenance finish and may allow repairs if damage occurs.
Choose moisture-resistant niches or corner shelves so shampoo bottles do not collect on the floor. For flooring, look for a texture that improves traction without feeling harsh under bare feet.
How Much Can a Conversion Cost?
A conversion should be budgeted as a range, not a single guaranteed number. Recent national estimates place many tub-to-shower projects between about $2,000 and $12,000, while custom tile, curbless entries, frameless glass, and substantial plumbing work can push costs higher. Materials, plumbing changes, shower style, and enclosure choices all influence the final price.
Include demolition and disposal, wall repair, waterproofing, drain or water-line changes, fixtures, storage, seating, permits, and local labor rates in the budget. Keep a reserve for concealed damage, particularly in older bathrooms where moisture may have affected framing or the subfloor.
Set a Realistic Project Timeline
- Measure the bathroom and define the project goals.
- Select the layout, base, wall system, fixtures, lighting, and accessories.
- Confirm product availability before demolition begins.
- Remove the tub and inspect plumbing, framing, and subfloor conditions.
- Complete repairs, then install the base, waterproofing, walls, and enclosure.
- Test drainage, water flow, seals, and door operation before final completion.
A basic same-footprint conversion can move faster than a custom tiled shower with relocated plumbing. Request a written schedule that identifies material deadlines and explains how unexpected repairs will be handled.
Common Planning Mistakes to Avoid
- Ordering fixtures before verifying rough plumbing dimensions.
- Selecting a door that blocks the safest shower entry.
- Skipping wall reinforcement for future grab bars.
- Using smooth flooring in a consistently wet area.
- Overlooking storage for towels, toiletries, and cleaning supplies.
- Setting no allowance for hidden water damage or code updates.
- Changing the layout after custom materials are ordered.
How to Compare Remodeling Estimates
Compare more than the bottom-line price. Confirm whether each estimate includes demolition, disposal, permits, plumbing or electrical work, waterproofing, cleanup, and inspections. Ask for a breakdown of labor, materials, fixtures, allowances, and warranty terms. A detailed installation plan is usually more valuable than a vague, low quote.
When a Full Bathroom Remodel May Be Better
A focused conversion may not solve issues such as poor ventilation, outdated wiring, damaged flooring, inadequate storage, or a layout with unsafe clearance. If several systems need attention, a full remodel can be more efficient than completing separate projects over several years.
Final Checklist Before Work Begins
- Confirm final measurements and shower entry direction.
- Approve a written scope of work and payment schedule.
- Select all visible finishes, fixtures, storage, and lighting.
- Verify the drain, controls, seat, and niche locations.
- Plan for bathroom access during construction.
- Keep funds available for concealed damage or required updates.
A well-planned tub-to-shower conversion can make a bathroom safer, simpler, and more enjoyable for years. Start with function, drainage, waterproofing, and entry access, then choose finishes that support the way the household actually lives.