Table Of Contents
- Why A Wet-Area Remodel Can Make A Big Difference
- How To Assess The Current Bathroom
- Safety Features Worth Adding
- Choosing Low-Maintenance Materials
- Planning A Better Layout
- Tub Or Shower: Which Fits The Space?
- Building A Practical Remodel Budget
- A Simple Remodeling Process
- Questions To Ask Before Work Begins
- Common Planning Mistakes To Avoid
- Final Thoughts
A bathroom remodel should do more than refresh an outdated look. The right wet-area update can make everyday routines safer, reduce cleaning time, improve storage, and help the room work better for changing household needs. Experienced bathroom remodelers can help homeowners evaluate the shower, tub, walls, flooring, and plumbing as a connected system instead of treating each choice separately.
Start by focusing on the parts of the bathroom that receive the most water and are used the most. A slippery floor, tall tub wall, stained grout, poor ventilation, or cluttered shower may create daily frustration long before the rest of the room looks worn out. A well-planned remodel can solve those practical issues while still delivering a finished space that feels personal and modern.
Why A Wet-Area Remodel Can Make A Big Difference
Showers, tubs, wall surrounds, and floors have an outsized effect on comfort because they are used repeatedly and exposed to moisture every day. Replacing a difficult-to-clean tub surround or adding safer flooring can improve the room without requiring a full expansion. These updates can also support long-term independence. In fact, bathroom modifications were included in 53% of aging-in-place updates in 2026 research from the Home Improvement Research Institute.
How To Assess The Current Bathroom
Before choosing colors or fixtures, observe how the room performs during a normal morning. Notice where people bump into doors, reach too far for toiletries, leave wet footprints, or struggle to enter the bathing area. Cosmetic decisions are easier when the functional problems are clear.
Checklist For A Bathroom Assessment
- Is the tub or shower easy to enter and exit?
- Does water collect on the floor or around the shower base?
- Are walls cracked, stained, loose, or difficult to clean?
- Is there enough room to turn, sit, and reach daily items?
- Are towels, soap, and toiletries stored within easy reach?
- Does the exhaust fan remove moisture effectively?
- Is the lighting bright and even near the shower and vanity?
Have the existing plumbing, subfloor, ventilation, and wall conditions checked before finalizing finishes. Hidden moisture damage or outdated connections can alter the scope, so it is better to identify issues before ordering new materials.
Safety Features Worth Adding
Accessible design can look polished rather than clinical. Low-threshold or curbless shower entries, slip-resistant floors, lever-style faucets, handheld showerheads, bright lighting, and open walking paths can benefit children, adults, guests, and anyone with temporary or long-term mobility limitations.
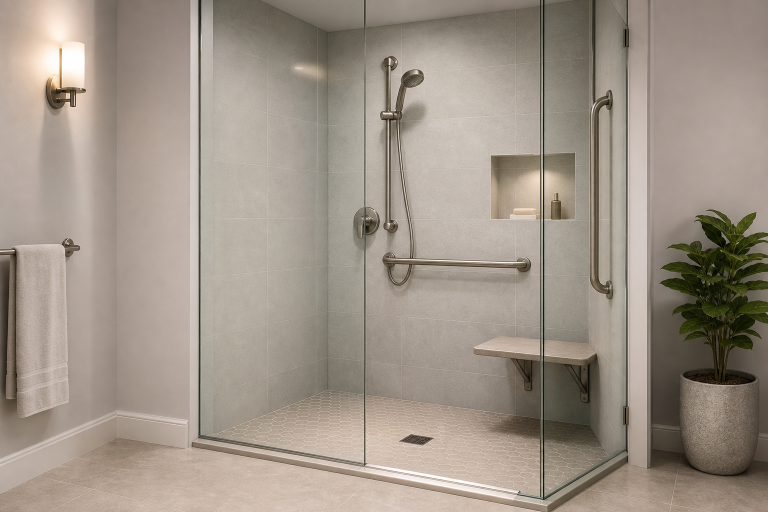
Include properly anchored grab bars where support may be needed, especially near the toilet and bathing area. Suction-cup products are not substitutes for permanently mounted bars. The ADA accessibility standards for grab bars and shower spaces offer useful planning guidance. Still, a residential installer should assess the wall structure and install support features to meet the household’s actual needs.
Recommended Features
- Low-threshold or curbless shower entries
- Slip-resistant shower bases and flooring
- Securely mounted grab bars
- Built-in or fold-down shower seating
- Handheld showerheads on adjustable slide bars
- Bright task lighting and reduced shadows
Choosing Low-Maintenance Materials
Choose materials based on their performance around water, not only their color or pattern. Ceramic and porcelain tile are durable choices, but grout requires regular attention. Acrylic panels and solid-surface surrounds have fewer seams, which can mean less scrubbing. Natural stone can be striking but may need more specialized care, while luxury vinyl flooring can offer a softer, water-resistant option when installed correctly.
Material Questions To Consider
- How many seams and joints will the surface have?
- Will it need grout, sealing, or special cleaners?
- Can it tolerate frequent cleaning and moisture?
- Will mineral buildup, scratches, or stains be highly visible?
- Is it suitable for the bathroom floor, walls, or both?
Planning A Better Layout
Small layout changes can make a compact bathroom feel much more usable. Keep the shower entry open, allow doors and drawers to clear nearby fixtures, and place storage where it will be used. A recessed shower niche or corner shelf can keep bottles off the floor, and planning lighting before walls are closed helps prevent poorly lit corners later.
For example, moving commonly used products into a shower niche can reduce bending and clutter. Reversing an awkward door swing or selecting a narrower vanity may create a clearer path without adding square footage.
Tub Or Shower: Which Fits The Space?
The tub-versus-shower decision should reflect household routines, not a passing trend. Keep or add a tub when young children use the bathroom, soaking is important, and safe entry is realistic. Choose a shower when the tub is rarely used, stepping over its wall is difficult, or faster cleaning and a more open bathing area are priorities.
Before removing a tub, consider the rest of the home. Retaining at least one tub may be useful for future buyers, visiting family members, or changing household needs.
Building A Practical Remodel Budget
A realistic budget includes more than visible fixtures. Account for design, demolition, disposal, permits, plumbing, electrical work, ventilation, waterproofing, flooring, trim, storage, and safety accessories. Set aside a contingency reserve for damage found behind walls or below the floor.
Compare written scopes of work rather than choosing only the lowest price. A detailed quote should identify products, labor, exclusions, cleanup, warranty terms, and the process for approving unexpected repairs.
A Simple Remodeling Process
- Define the problems: List safety, cleaning, comfort, and storage concerns.
- Measure the room: Record fixture sizes, door openings, and plumbing locations.
- Set priorities: Separate essential features from cosmetic upgrades.
- Review samples: Check materials under the bathroom’s actual lighting.
- Request detailed quotes: Confirm timing, warranties, and exclusions.
- Inspect the finished work: Test drainage, fixtures, seams, lighting, and cleanup.
Questions To Ask Before Work Begins
- Who will complete the installation?
- Are permits or inspections required?
- How will the wet area be waterproofed?
- What happens if damage is discovered?
- Which materials are included in the quote?
- Who handles debris removal and final cleanup?
- What maintenance does each surface require?
- What does the written warranty cover?
Also, verify licenses, insurance, references, recent project photos, and local feedback. Read the full contract before signing, particularly the sections covering payment timing, change orders, and project delays.
Common Planning Mistakes To Avoid
Avoid choosing style before solving safety, drainage, ventilation, storage, and layout concerns. Other common missteps include selecting high-maintenance grout without a cleaning plan, adding grab bars after the walls are finished, removing the only tub without considering future needs, and accepting vague estimates without a material list.
A safer bathroom does not have to look institutional. Coordinated hardware, warm lighting, thoughtful color, textured surfaces, and integrated storage can make practical features feel intentional.
Final Thoughts
A successful bathroom remodel makes the space safer, easier to maintain, and more comfortable every day. Start with real household needs, select durable materials, plan for moisture and storage, and leave room for future changes. A thoughtful wet-area update can serve the household well for years to come.